|
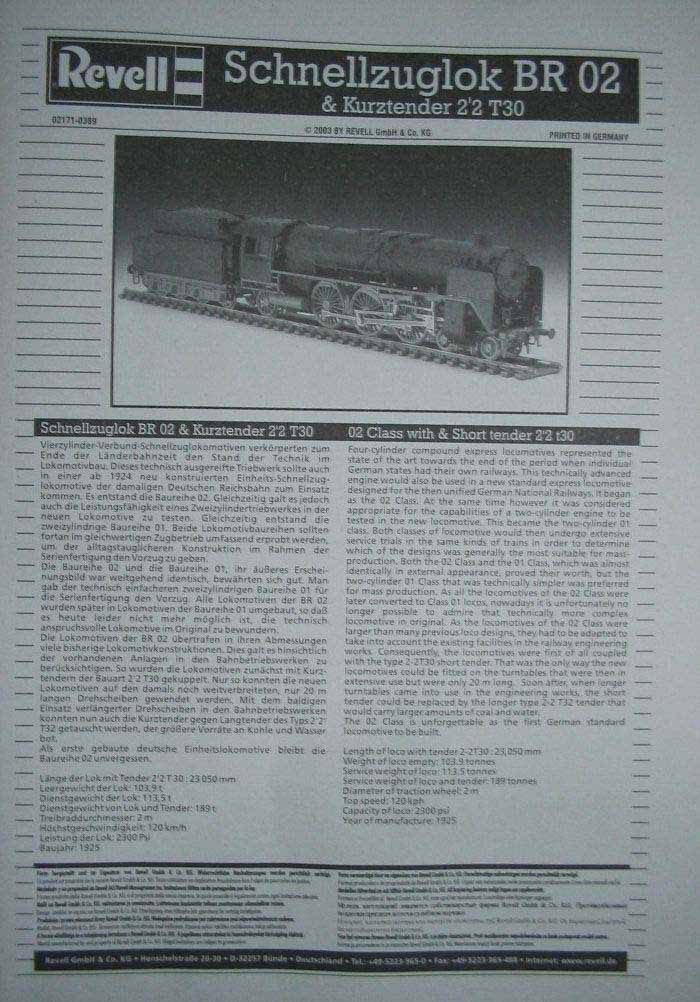
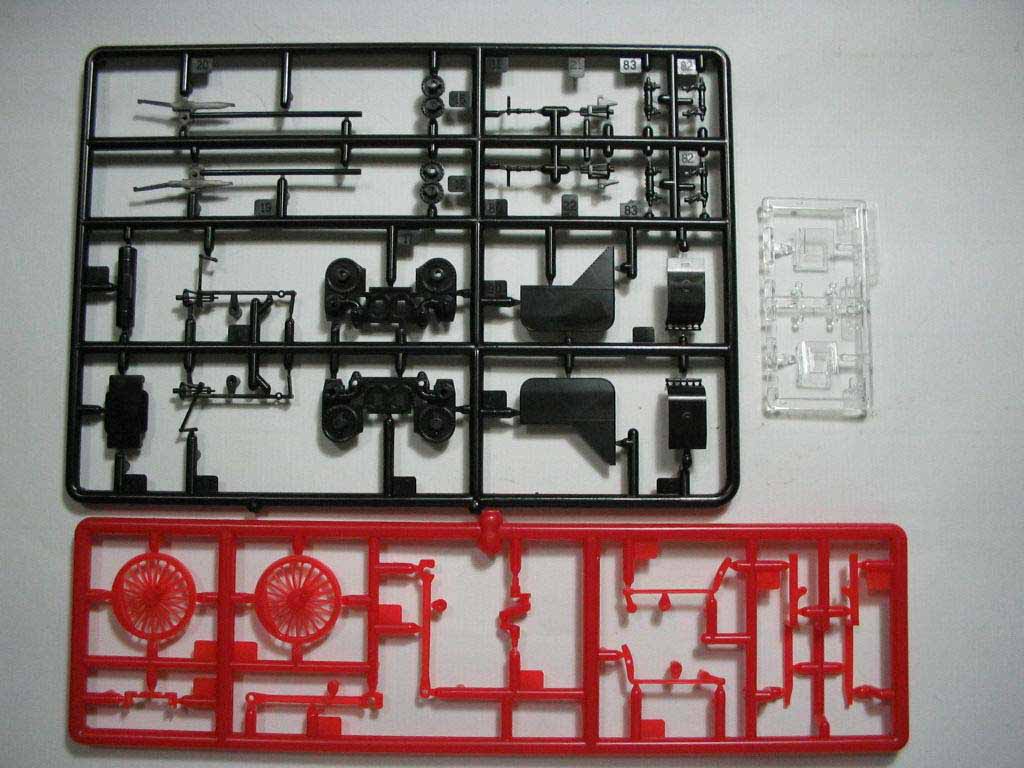
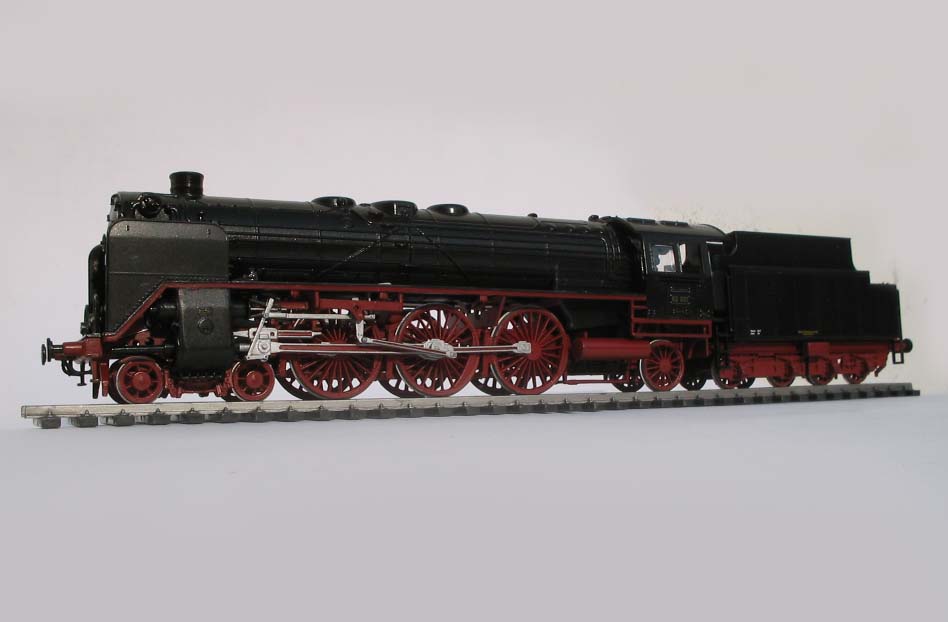
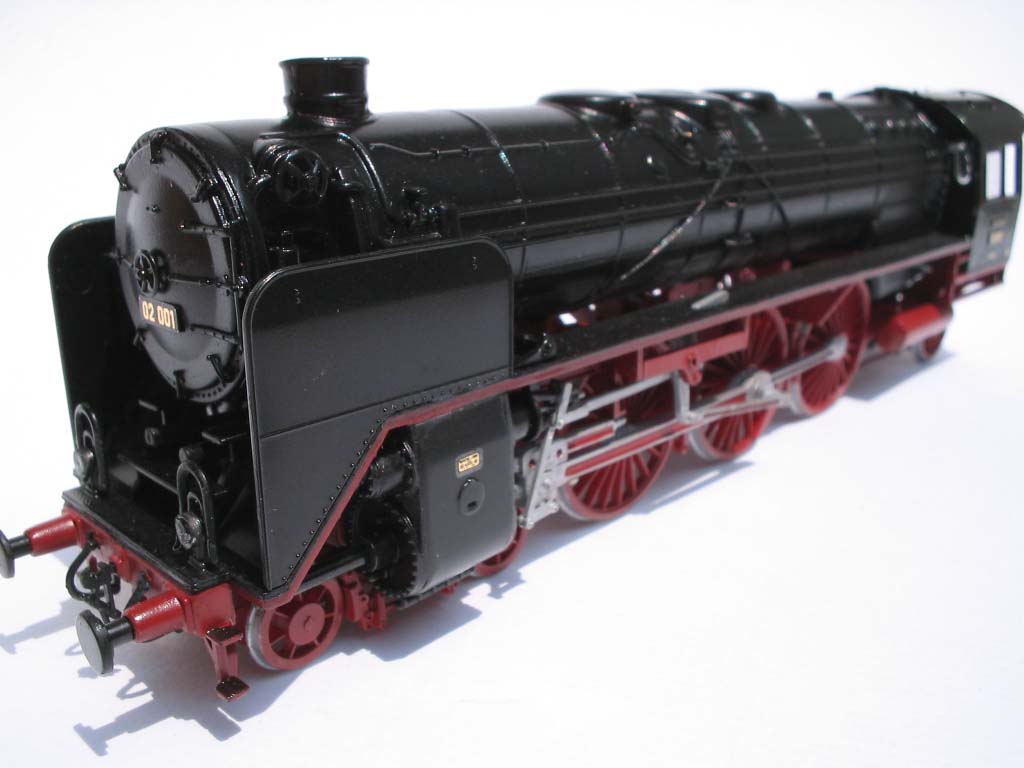
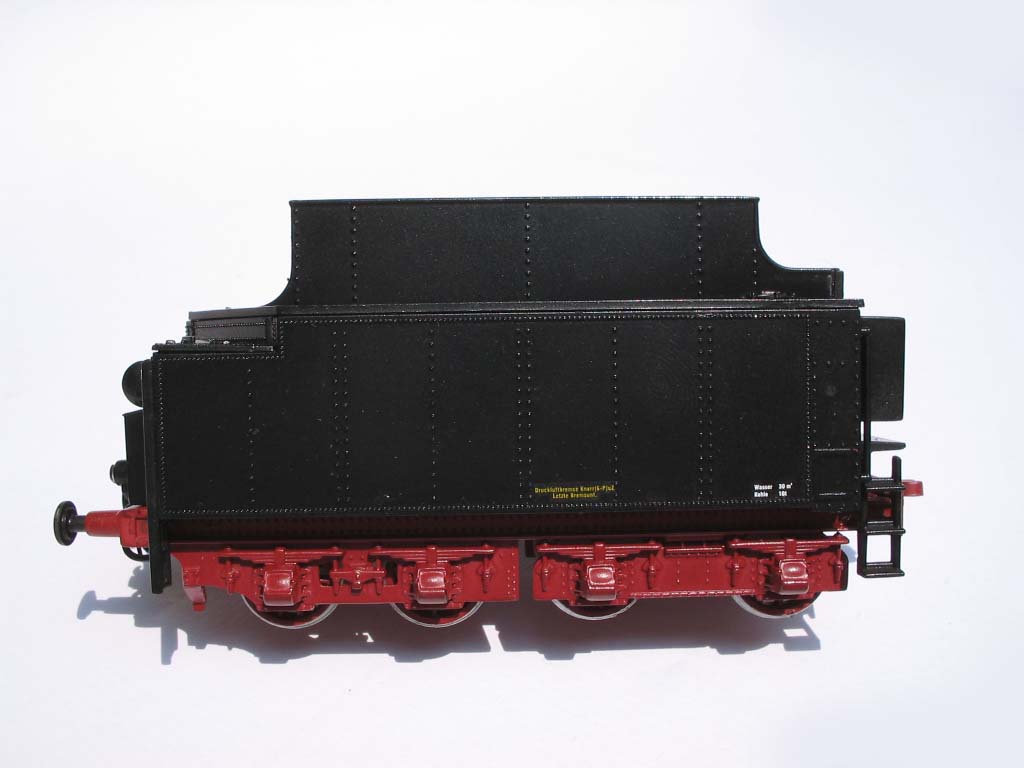
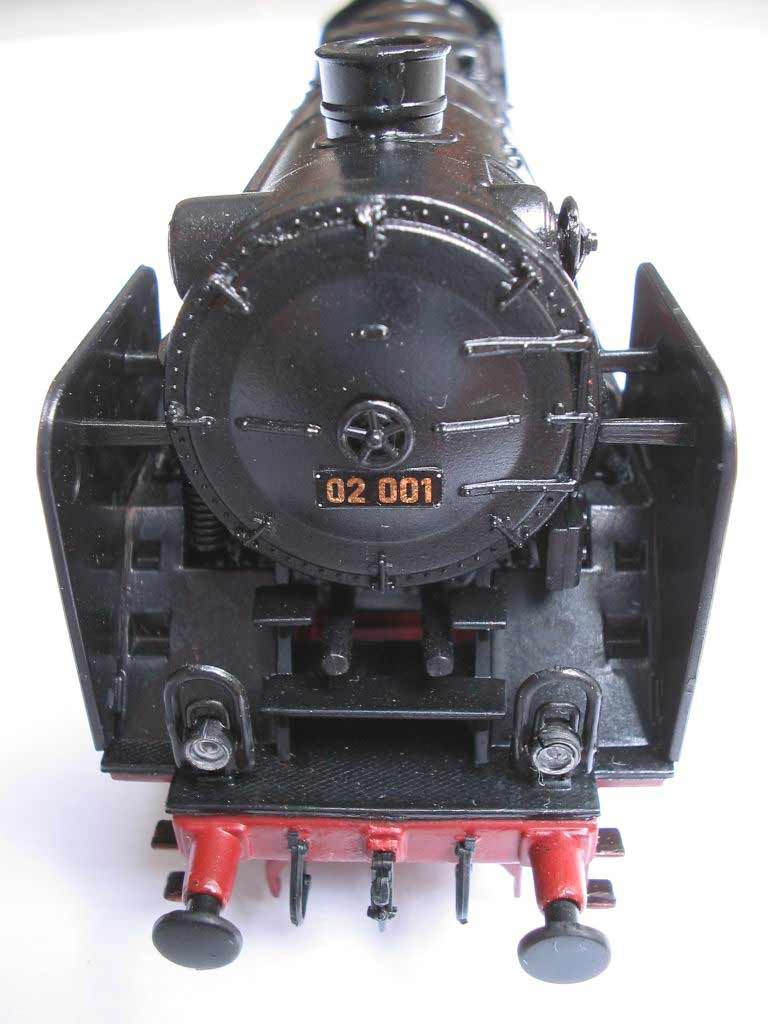
The Prototype The BR 02 was designed as an experimental express passenger locomotive for the newly unified German railways in 1925. The other candidate, BR 01, was very similar, but it has a two-cylinder simple engine, while the BR 02 is a four-cylinder compound. *For those lacking knowledge in railway terms, a "simple" engine is one in which the steam works in a single power stroke, after which it is passed to the atmosphere, while a "compound" has the steam working in several power strokes, usually two.* The locomotives were used on the Regensburg-Hof-Leipzig, M�nchen-Berlin and Hof-Dresden-Breslau line for fast passenger trains. Although the BR 02 was more efficient than the BR 01, maintenance costs were higher. The simpler solution was preferred, and thus the class was not developed further. In 1937-1942, the BR 02s, of which there were ten, were converted to BR 01s. The Kit The kit is a new one (2003), made in China (unlike the BR 41 and 50 which were made in Poland). It contains 4 sprues (locomotive, tender, undercarriage and wheels, transparent parts) common to the BR 01 and 02 kits, and 2 specific sprues for the BR 02 (cylinder blocks, wheels). The sprue containing parts for the undercarriage of the locomotive is molded red, while others were black. The kit is molded cleanly, without any flash and minimal mold parting lines. Revell seems to have put a lot of effort in this kit, as it looks very good. This kit looks like a recent release of the Asian model companies, rather than Revell, which is usually typified by the rather blocky and clunky parts. The parts are much finer than the older kits: components are thinner (closer to scale) and the amount of detail provided is better (such as braking rods and pipes which are not present in the older kits). Another good point is the possibility of building the model without the coal load. This is good since the coal load provided in the kit does not look as good as the ones provided in the earlier kits. Even the instruction sheet is better than those provided on the other kits. The first sheet (cover) is printed on thicker paper material. The pictures are large, and steps are clearly illustrated, which is an excellent help (especially assembly of the complex valve-gear). The assembly steps are logical, although one might want to construct several assemblies at the same time: undercarriage, boiler and tender. Even the decal positioning illustration looks like real technical drawings, compared to the almost half-hearted effort on the BR 41 and 50 (which showed the driving rods at the same phase on both sides of the locomotive!). As a side note, the box illustration is still not very good! Then, after all, it is the contents that count. Also, the "prototype model" on the box side is not very good - better than the BR 41 and 50 though, although one with some experience with Revell models should have been prepared anyway. One minor complaint is the molded on piping on the boiler. Although the new model has put Revell to the league of model locomotive manufacturers such as Roco, the molded-on piping makes it one level below Fleischmann and Märklin models, which has separate standing pipes on the boiler. The Revell model also lacks some of the more important pipes running from the locomotive to the tender, and the piping fastened under the running-board (See picture of Micro-Metakit model). Still, this is a relatively minor complaint, as these piping will not be highly visible once the completed model is placed in an engine shed, as most model railroaders will do so. Accuracy-wise, the kit seems to be quite accurate, as when I compared it to photographs of the BR 02 and similar BR 01 brass models (Micro-Metakit). An interesting note is that the BR 02 has extended smokestack from new, while the prototype BR 01 did not. The decal sheet contains markings for four locomotives (40% of the total number of the prototype!), which is good, since one can build several models with different numbers, if one wishes to do so. This is an improvement over the very limited selection of numbers provided on the BR 41 and 50 models. The decals were nicely printed by Cartograf, simulating well the brass lettering of the originals. Note that the Krauss-Maffei builder plates are only accurate for 02 010, as correctly shown in the instruction, but they are printed next to the decals for 02 006. Modelers beware! Only one paint scheme is provided: black and red. It must be noted that the inter-war German railways (DR) used a slightly darker red than the post-war railway (DB), so the suggested Revell 330 (fiery red) might be incorrect. A darker, more brownish red should be used instead. It would have been interesting, had Revell provided the photographic grey scheme, which lately seemed to be common among model locomotive manufacturers, as an option. Several early German standard locomotives also seemed to be painted in olive green and black/steel. Construction
I painted the model with Tamiya spray paints: TS29 (Semi Gloss Black) and TS 33 (Dull Red), and touched up some parts with X18 (Semi Gloss Black) with a brush. XF16 (Flat Aluminum) is used in place of steel.
Model reviewed courtesy of my wallet. The kit is available from Peter & Partner in Mall Taman Anggrek, Jakarta, and a shop in Mal Ciputra, Semarang (do not remember the name). Both are priced at IDR 235,000. Usual disclaimers apply.
Photographs (except Micro-Metakit model, taken from Reynauld's Web site)
taken with a Canon PowerShot A300.
|